Our advice: arrange it before 1 December. 14 days left. Get started for 2026
Signing up your business in eight steps
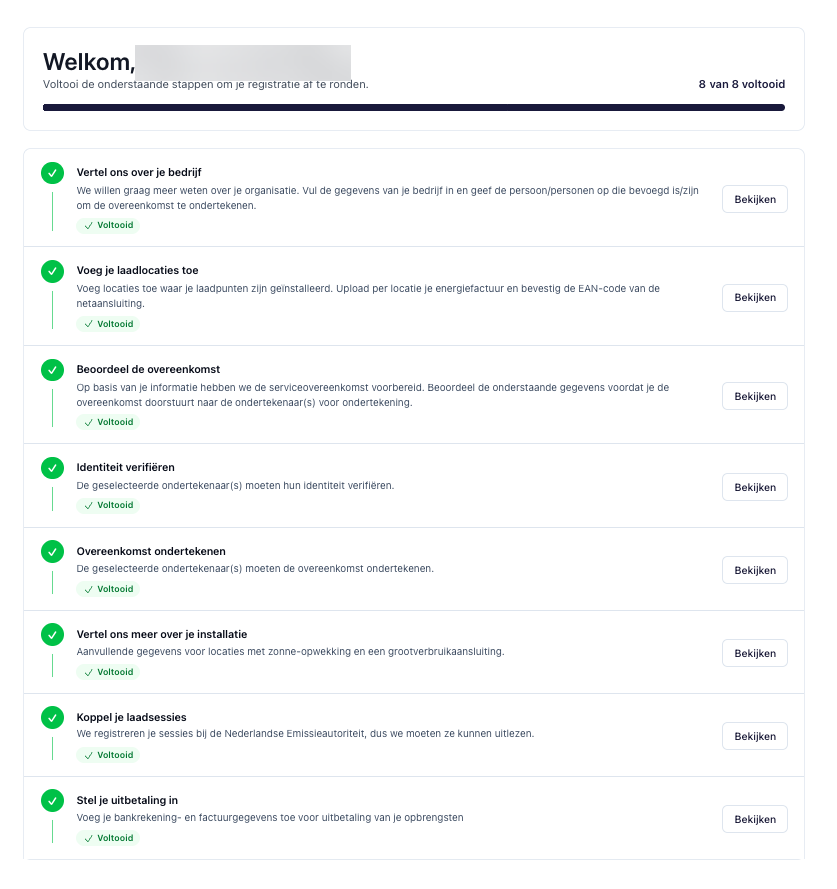
You finish your business sign-up in eight steps. Keep the items below at hand and you can do it in one go. What you finish is saved.
Contents
- Before you start
- Rather watch?
- Step 1: Tell us about your business
- Step 2: Add your charging locations
- Step 3: Review the agreement
- Step 4: Verify identity
- Step 5: Sign the agreement
- Step 6: Tell us more about your installation
- Step 7: Connect your charging sessions
- Step 8: Set up your payout
- After you sign up
- Stuck?
- Frequently asked questions
Before you start
A recent energy bill for each location
A PDF of at most 10 MB. For a small-consumption connection it is at most 12 months old, for a large-consumption connection at most 2 months. The bill shows the company name, the address and the EAN code.
For large consumption, the grid operator invoice too
A PDF that is at most 2 months old.
Who signs on behalf of the company
You need the name and email address of that person. We take the people authorised to sign from the Chamber of Commerce (KvK) register.
A short description of your business
What does your company do? Write 50 to 250 characters.
The login details of your charging platform
With them you connect the charging sessions of your charge points.
The payout details of your company
The IBAN, the invoice address and the email address for invoices.
Only with your own solar generation on a large-consumption connection
The metering company, the electrical diagram of the installation and any subsidy details.
Rather watch?
Is your charger on E-Flux by Road? Then you sign up slightly differently. See signing up with E-Flux
Step 1 · Applicant
Tell us about your business
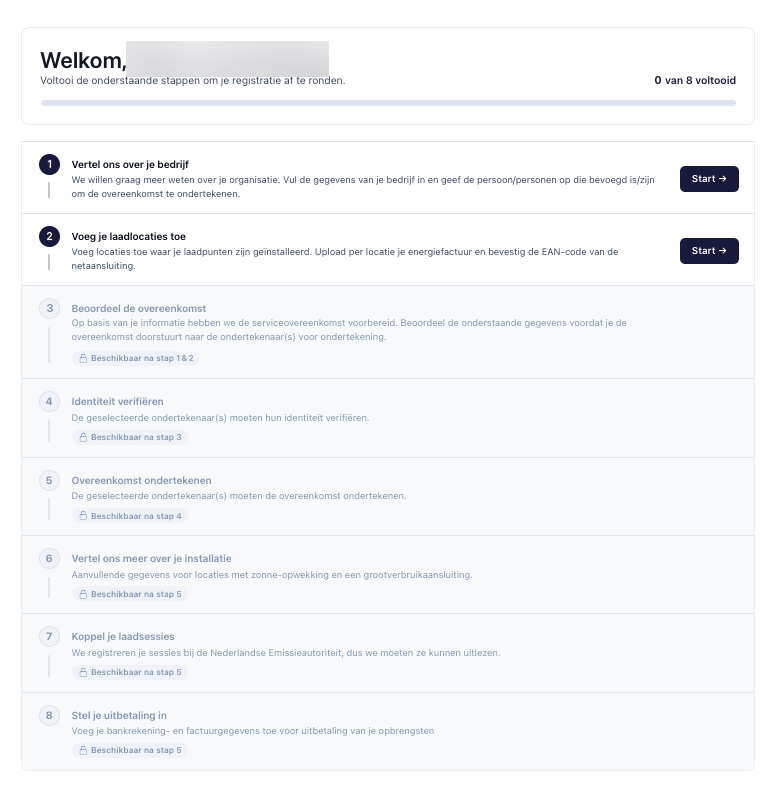
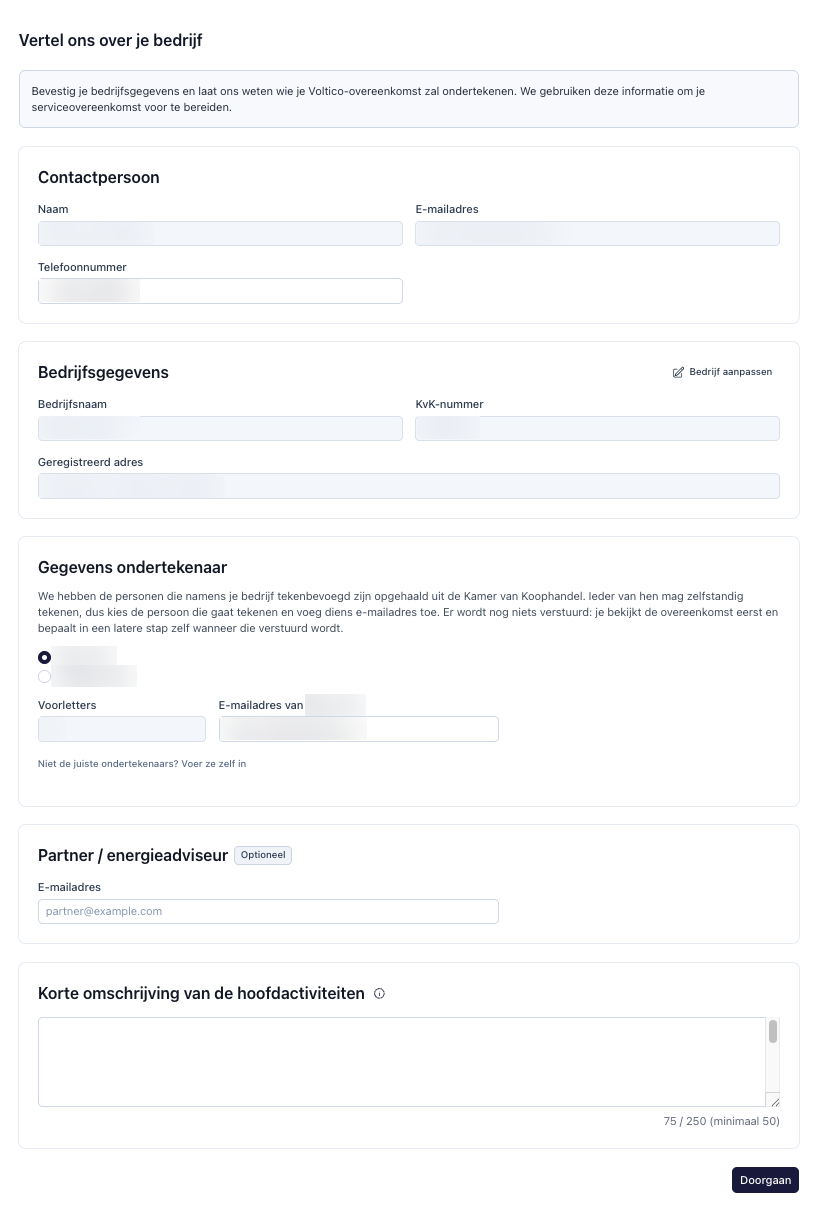
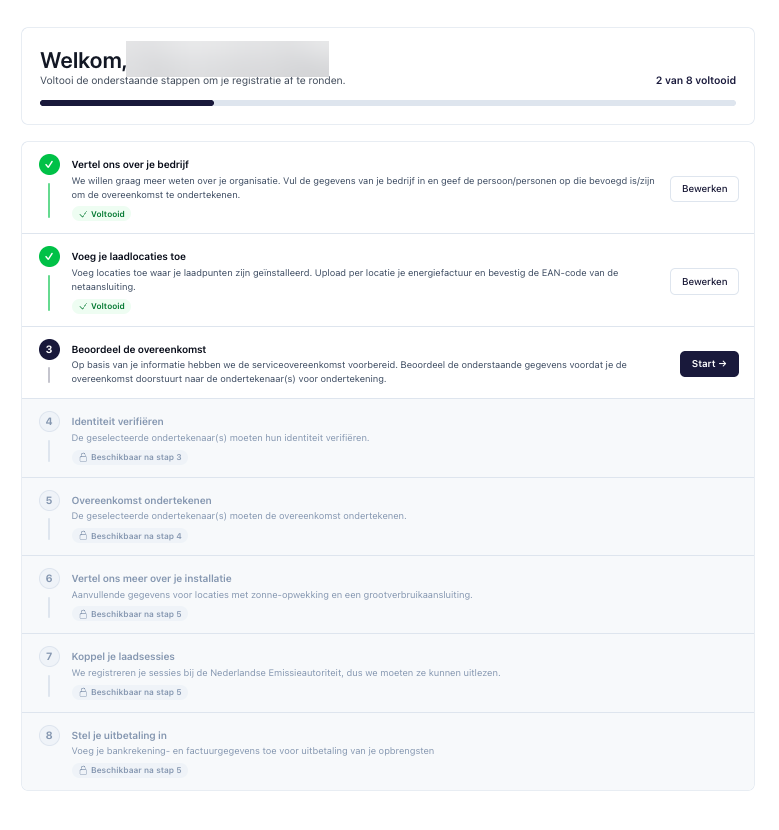
You start in your onboarding overview, where you see all eight steps. A lock means the step opens once the steps before it are done. We use the details from step 1 to draw up your agreement. Most fields come from the Chamber of Commerce. Action needed: yes.
- In the overview, check that your name at the top is spelled correctly, then click Start next to Tell us about your business.
- Enter your phone number with the country code, for example +31612345678.
- Check your company details. Something not right? Click Edit company.
- Under Signatory details, choose who signs the agreement and enter that person’s email address. Is the right person not listed? Click Not the right signatories? Enter them yourself.
- Optional: did a partner or energy adviser refer you? Enter that person’s email address.
- Write a short description of your main activities: at least 50 and at most 250 characters.
- Click Continue.
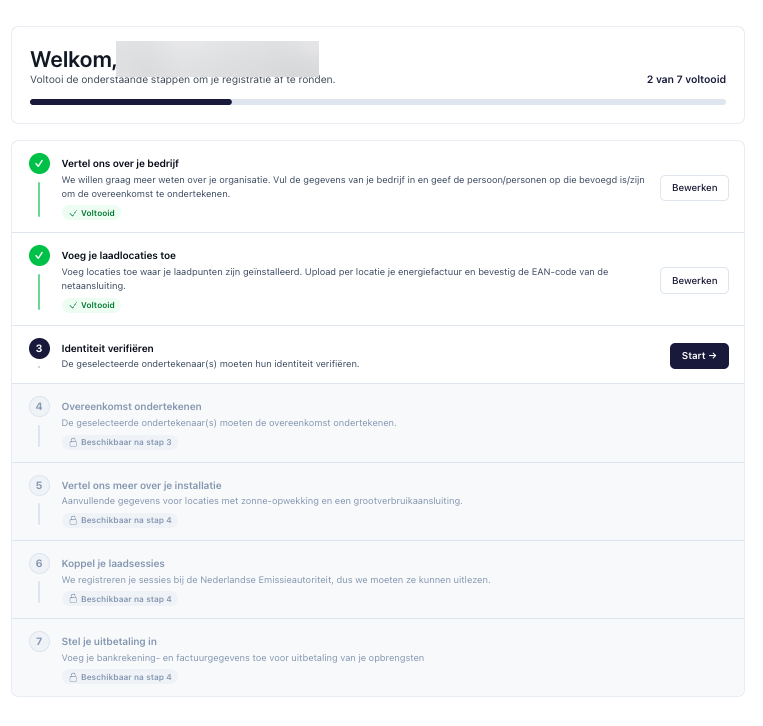
Do you choose yourself as signatory?. Then you have seven steps instead of eight. What changes is explained in the question below.
Do you sign yourself?
Step 2 · Applicant
Add your charging locations
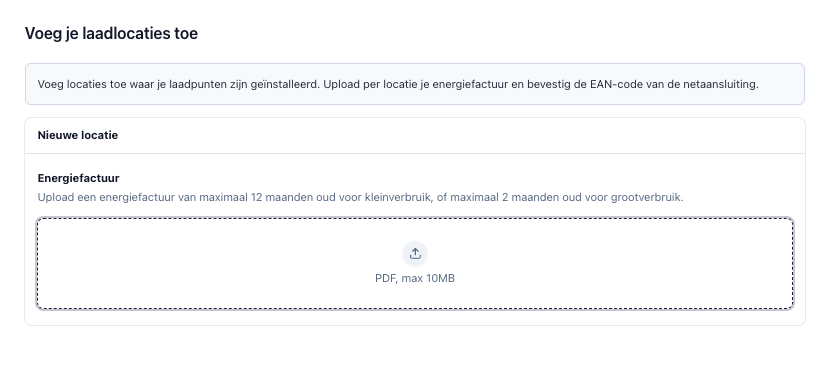
For each location you upload the energy bill. We read the connection details from it, so you do not have to type them. Then you check the location form and save it. Action needed: yes, for each location.
- Click the upload box and choose the energy bill of this location: a PDF of at most 10 MB.
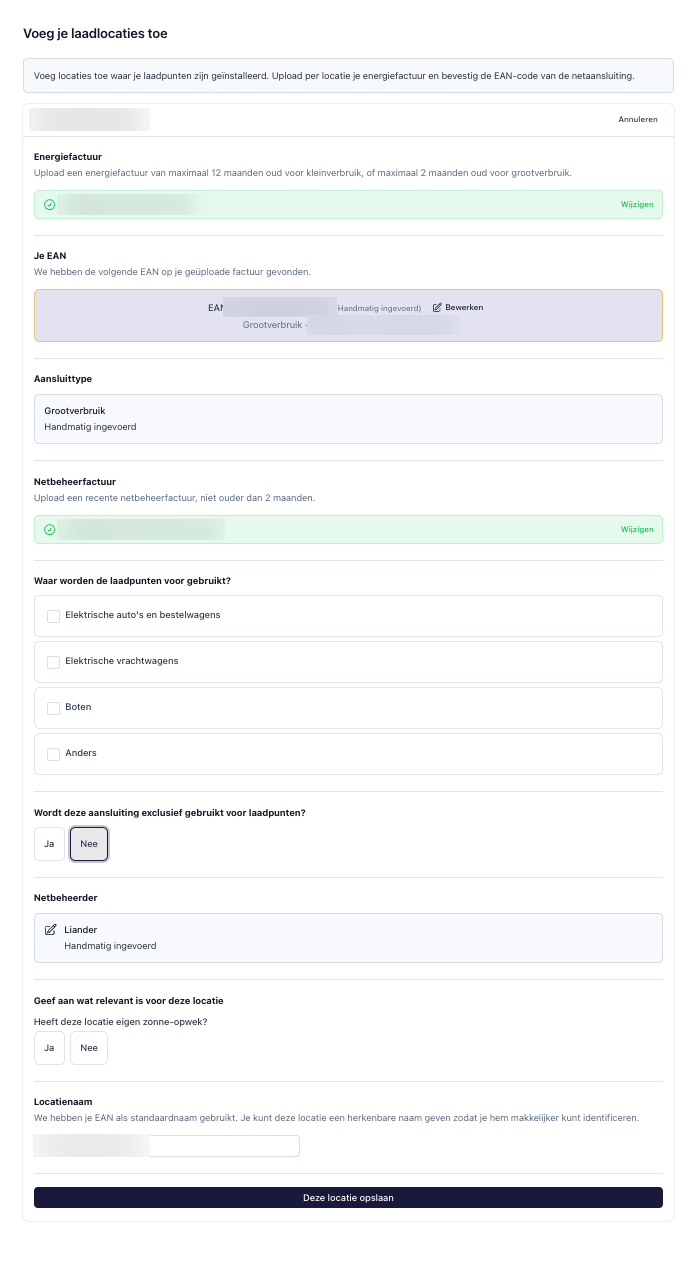
- Wait a few seconds. We read the EAN code, the connection type and the address from the bill. For small consumption we also take the grid operator from the bill.
- Check the EAN code. Is it wrong? Click Edit. An EAN code has 18 digits and usually starts with 871.
- Check the connection type.
- For large consumption: upload the grid operator invoice, a PDF at most 2 months old. For small consumption you enter the last 6 digits of the meter code instead.
- Tick what the charge points are used for and say whether the connection is used only for the charge points.
- Check the grid operator and say whether the location has its own solar generation.
- Optional: give the location a recognisable name. Click Save this location.
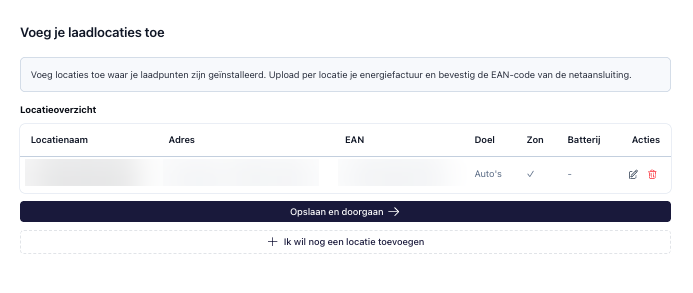
- In the list, check the name, address and EAN code of each location. Another charging location? Click I want to add another location.
- Click Save and continue. Back in your overview steps 1 and 2 are done and step 3 is open.
Add all locations now. After step 3 you can no longer change or add locations. Do you have more than one charging location? Add each one in the same way, with its own energy bill. You cannot add the same EAN code twice.
What must be on the energy bill?
Step 3 · Applicant
Review the agreement
Based on steps 1 and 2 we have drawn up the agreement for your company. Read it calmly and have a colleague read along if you like, before it goes to the signatory. Action needed: yes. This is the last step in which you can still make changes yourself.
- In your overview, click Start next to Review the agreement.
- Read the agreement. Check in particular the company details, the addresses and the EAN codes of your locations.
- Is something wrong? Go back to your overview and click Edit next to step 1 or 2.
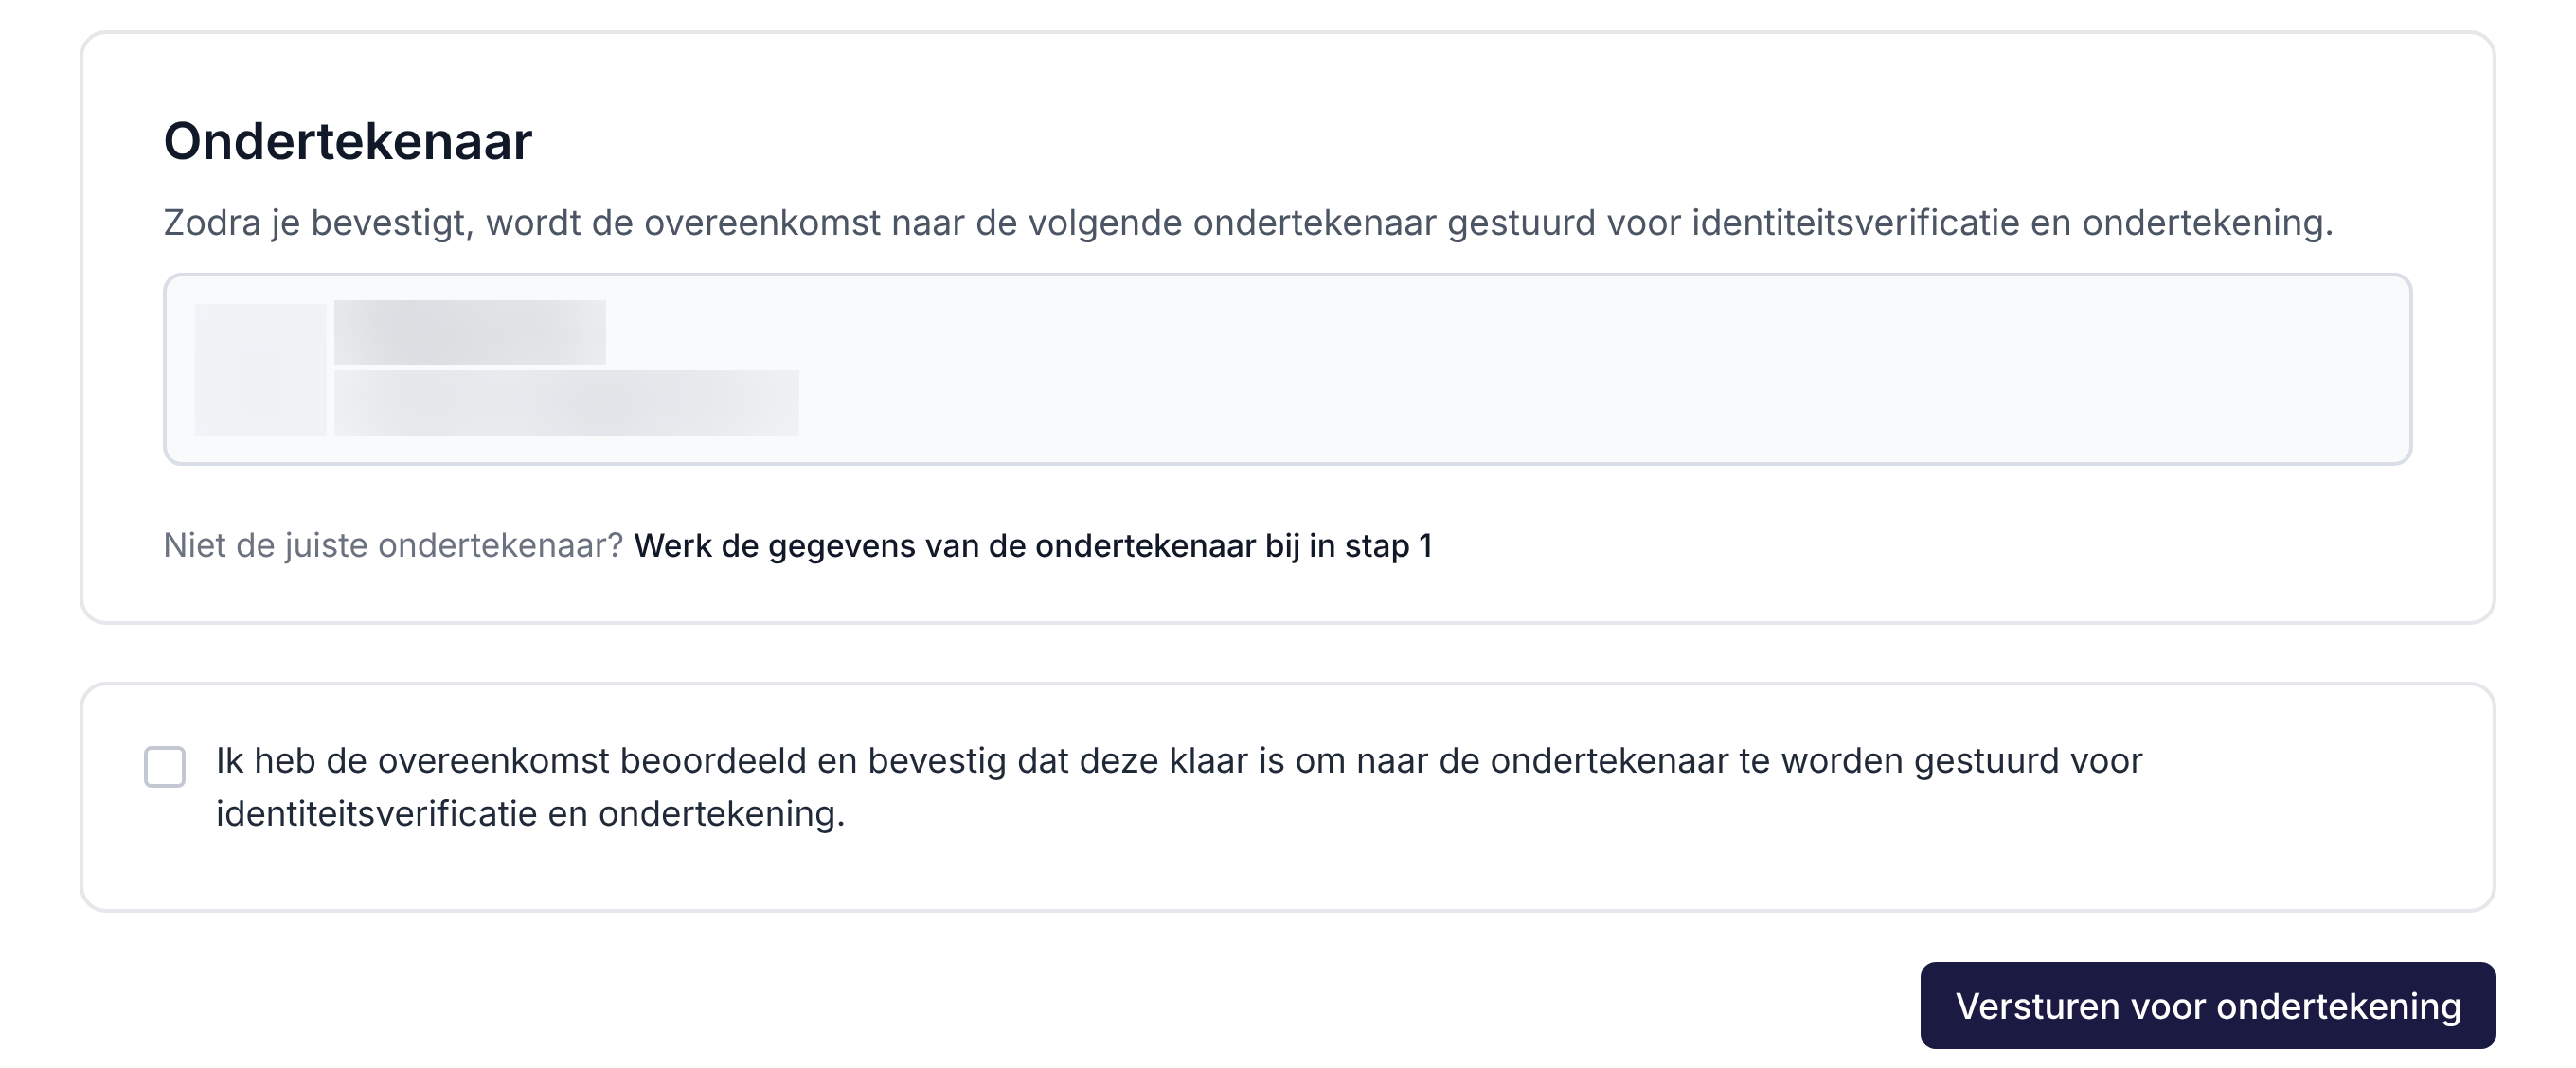
- Scroll down and check the name and email address of the signatory. Not the right person? Click Update the signatory details in step 1.
- Tick the box to confirm you have reviewed the agreement.
- Click Send for signature.
After this it is fixed. After sending, you can only view steps 1 and 2. Do you want to change something afterwards? Then contact support. So check everything first, the signatory included.
Step 4 · Signatory
Verify identity
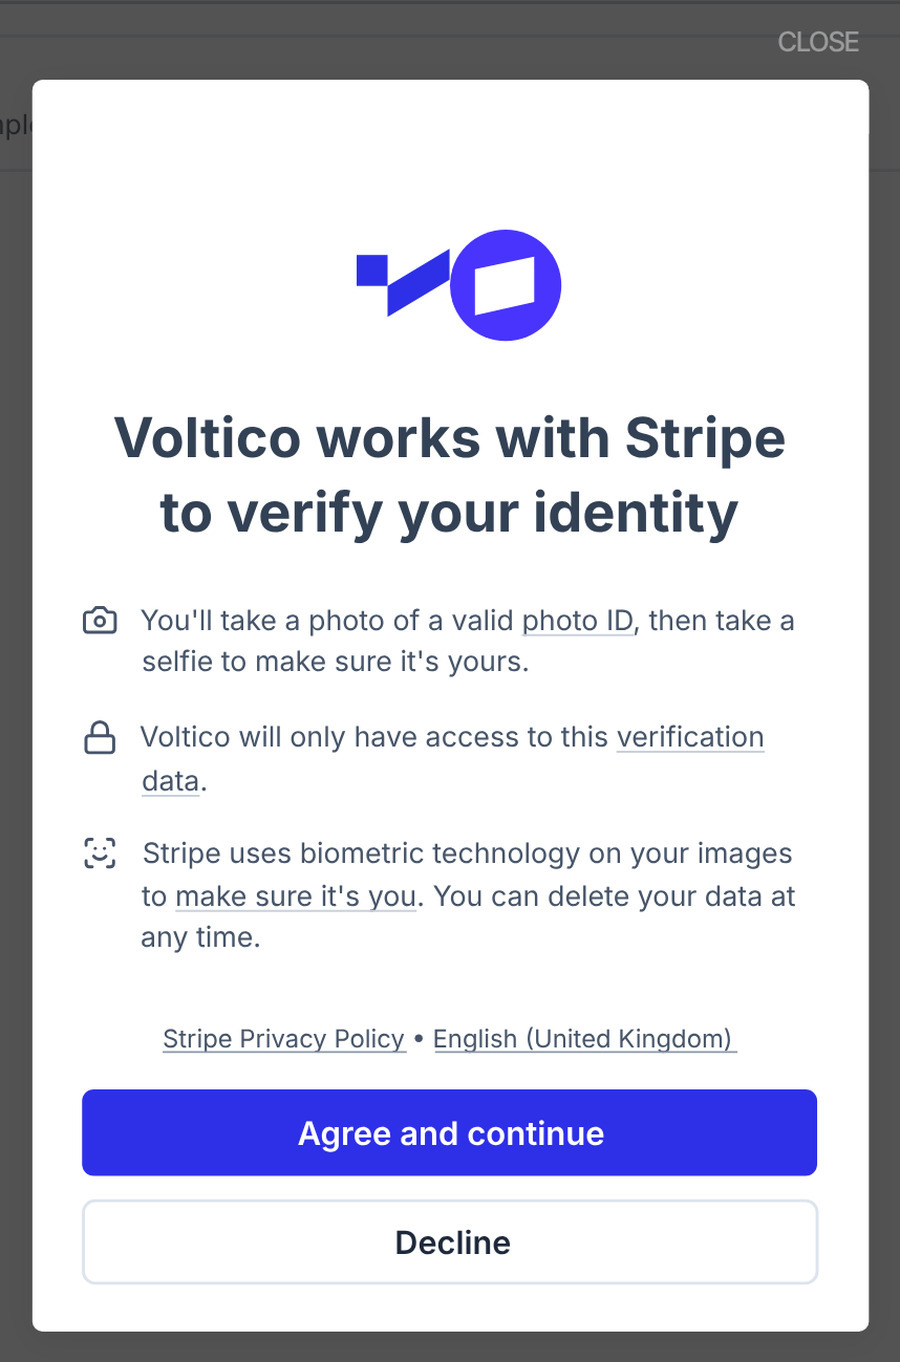
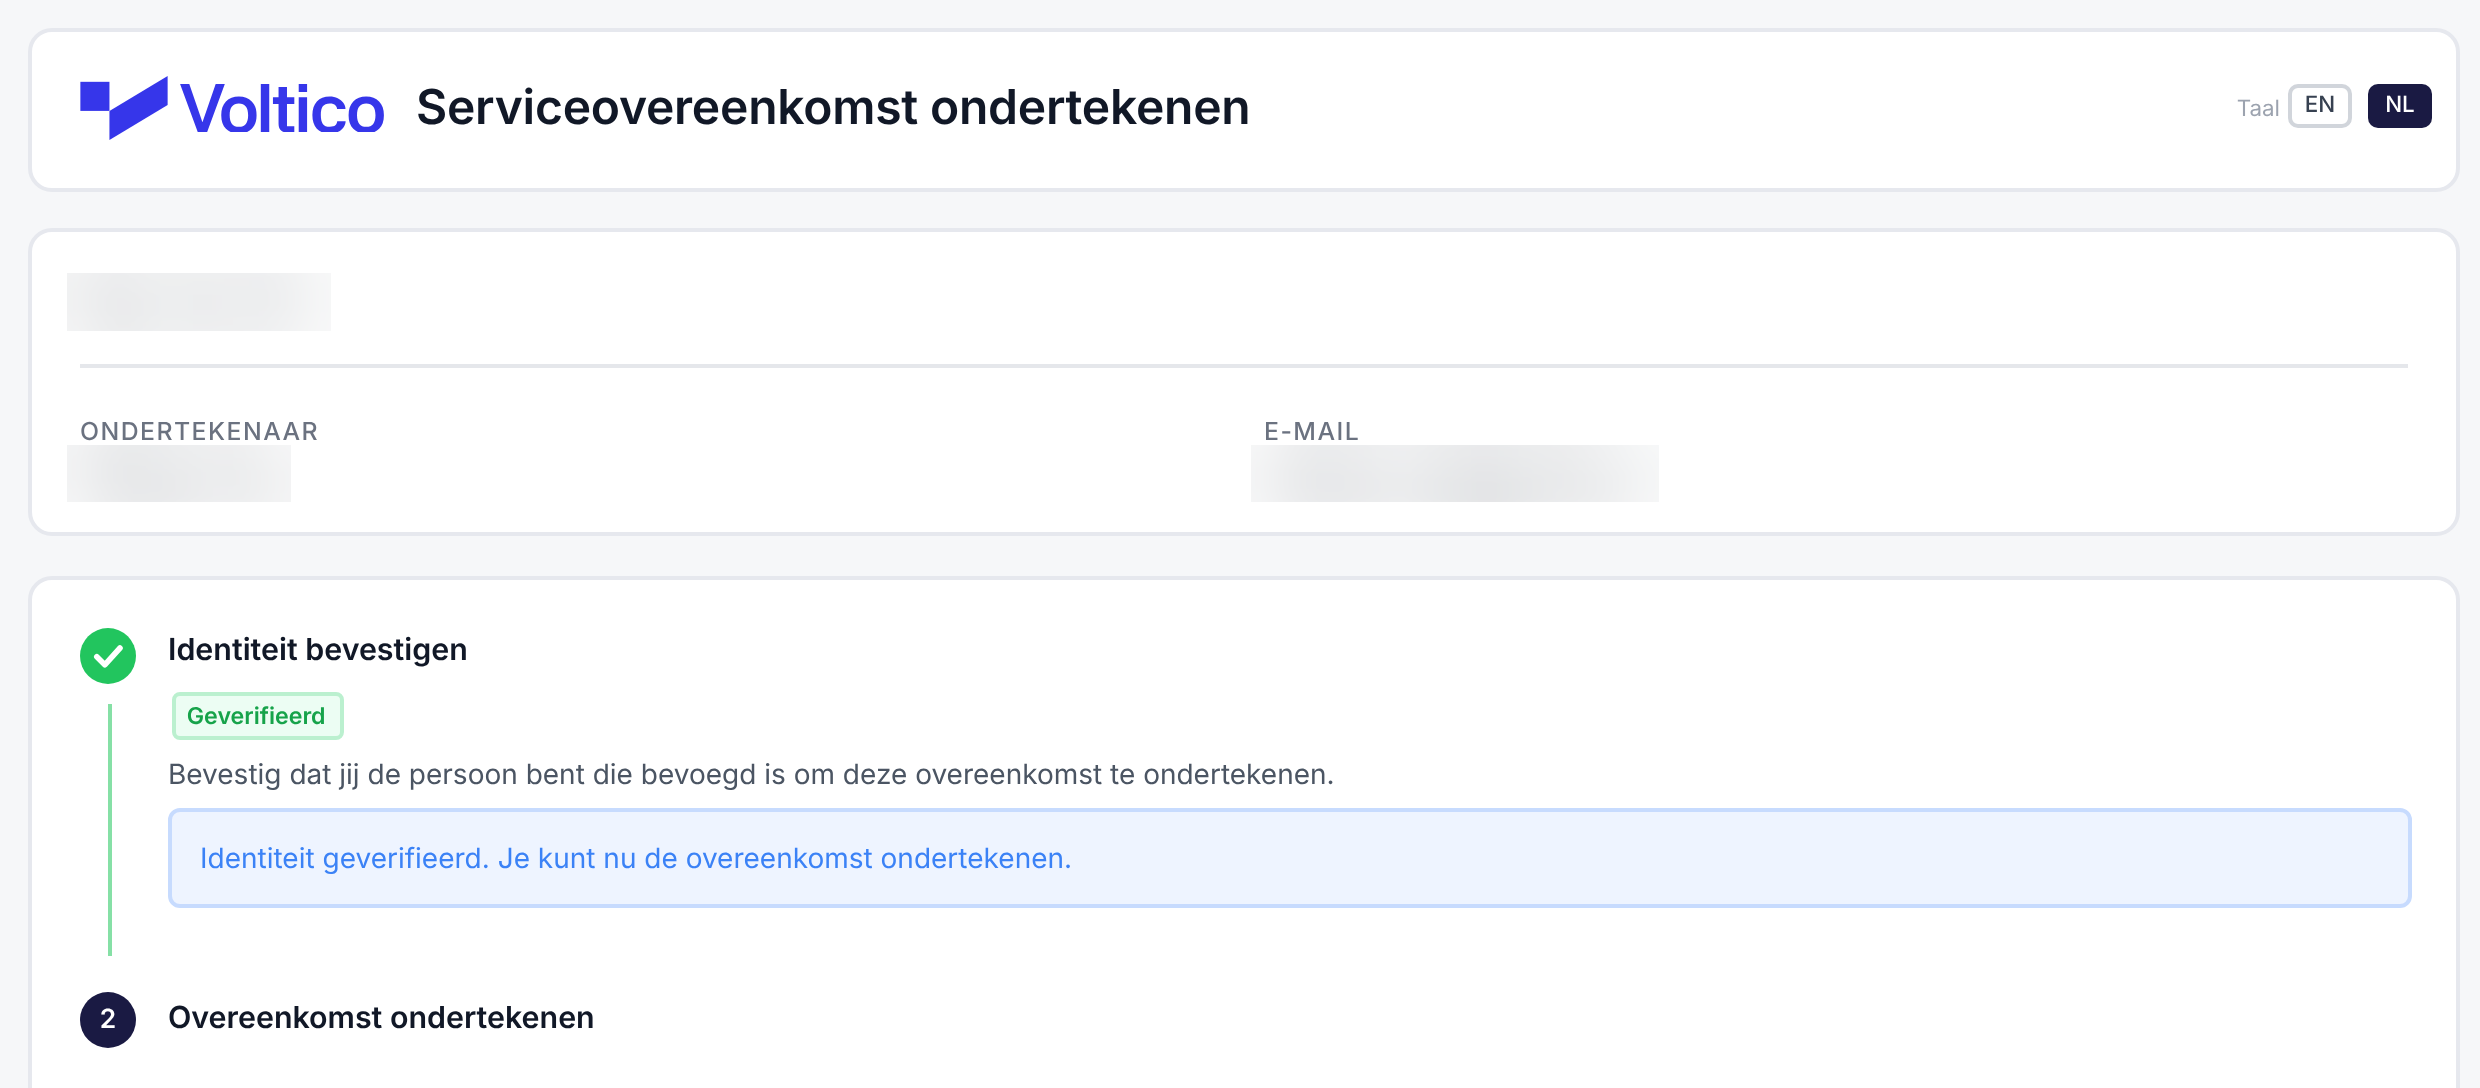
This step is for the signatory, through the link in the email from Voltico. Because the agreement is signed online, we need to be sure the signatory is who they say they are. Our partner Stripe runs the check. It takes about 2 minutes. The photos and the ID document are stored at Stripe, not at Voltico; Voltico uses the outcome. Action needed: yes, by the signatory. Are you the signatory? Then you do this yourself.
- Open the email from Voltico and click the link.
- At the top, check the company name, your name and your email address. Prefer English? Click EN at the top right.
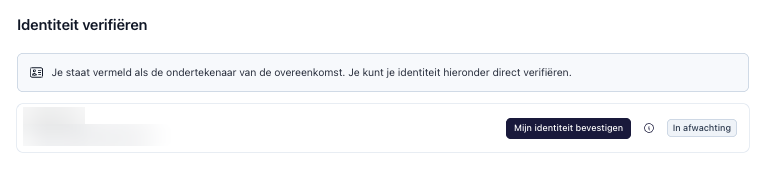
- Under Confirm identity, click the button to confirm your identity.
- Stripe opens. Read the explanation and click Agree and continue.
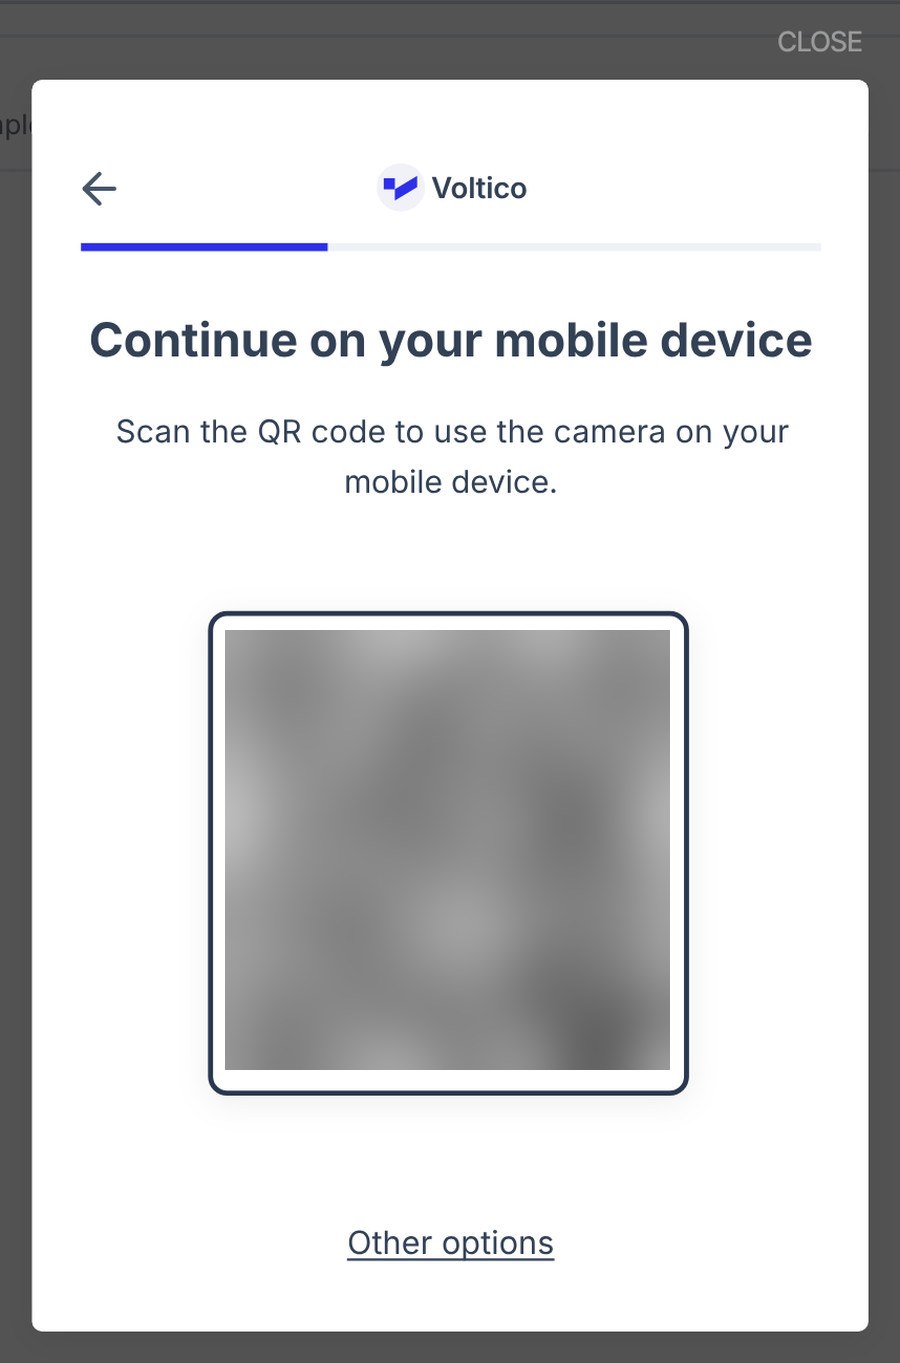
- Scan the QR code with your phone camera. Prefer your computer webcam? Click Other options.
- Follow the instructions on your phone: take a photo of your passport, ID card or driving licence and take a selfie.
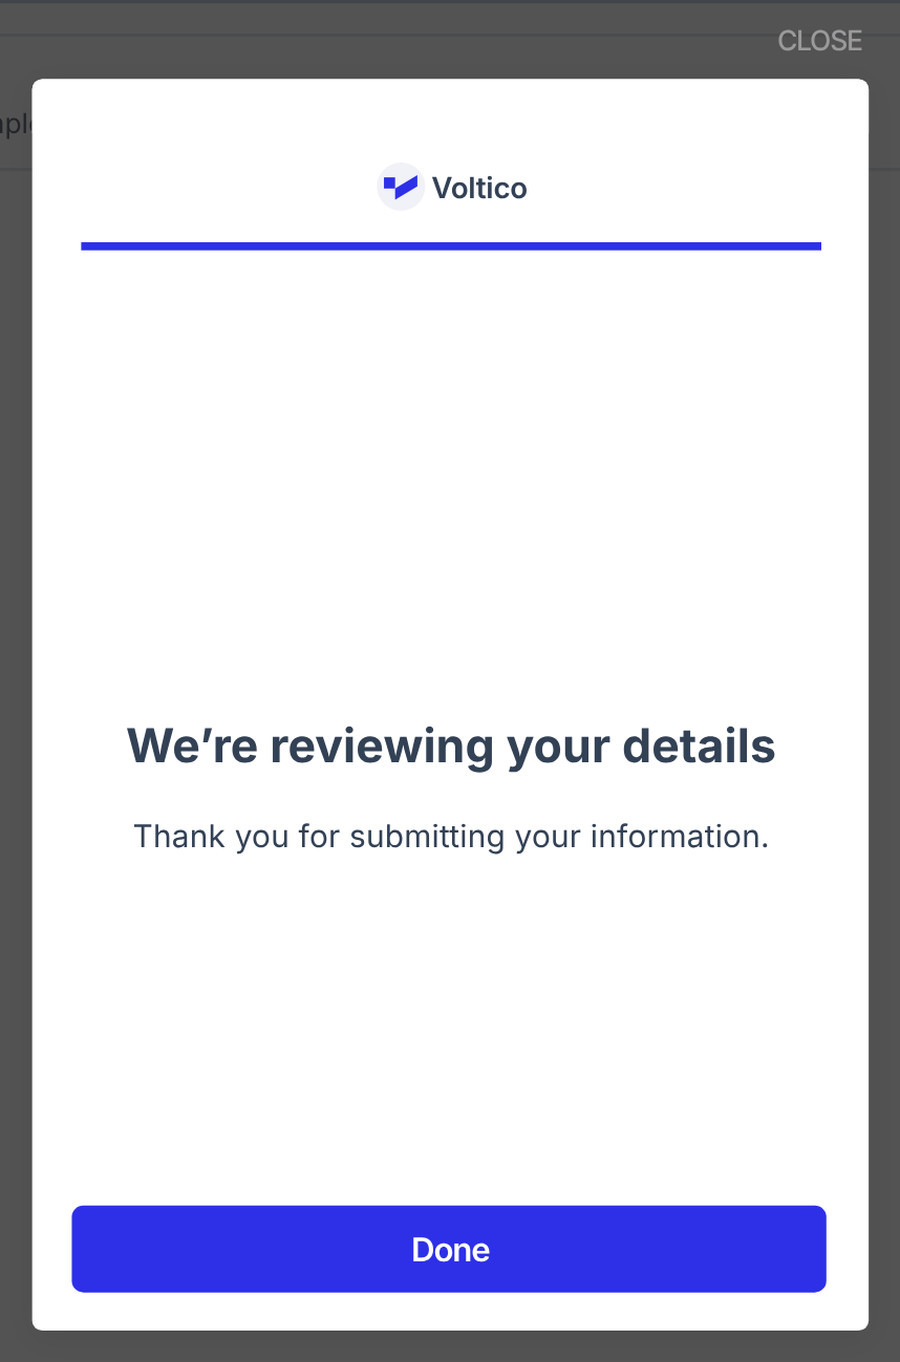
- Go back to your computer and click Done.
Use your official name. The check compares your name with your ID document. Does your passport say Petrus, but everyone calls you Peter? Then the signatory must be entered as Petrus. Use good light, put your ID document on a dark, flat surface with all four corners in view, and take off your glasses and cap for the selfie.
Step 5 · Signatory
Sign the agreement
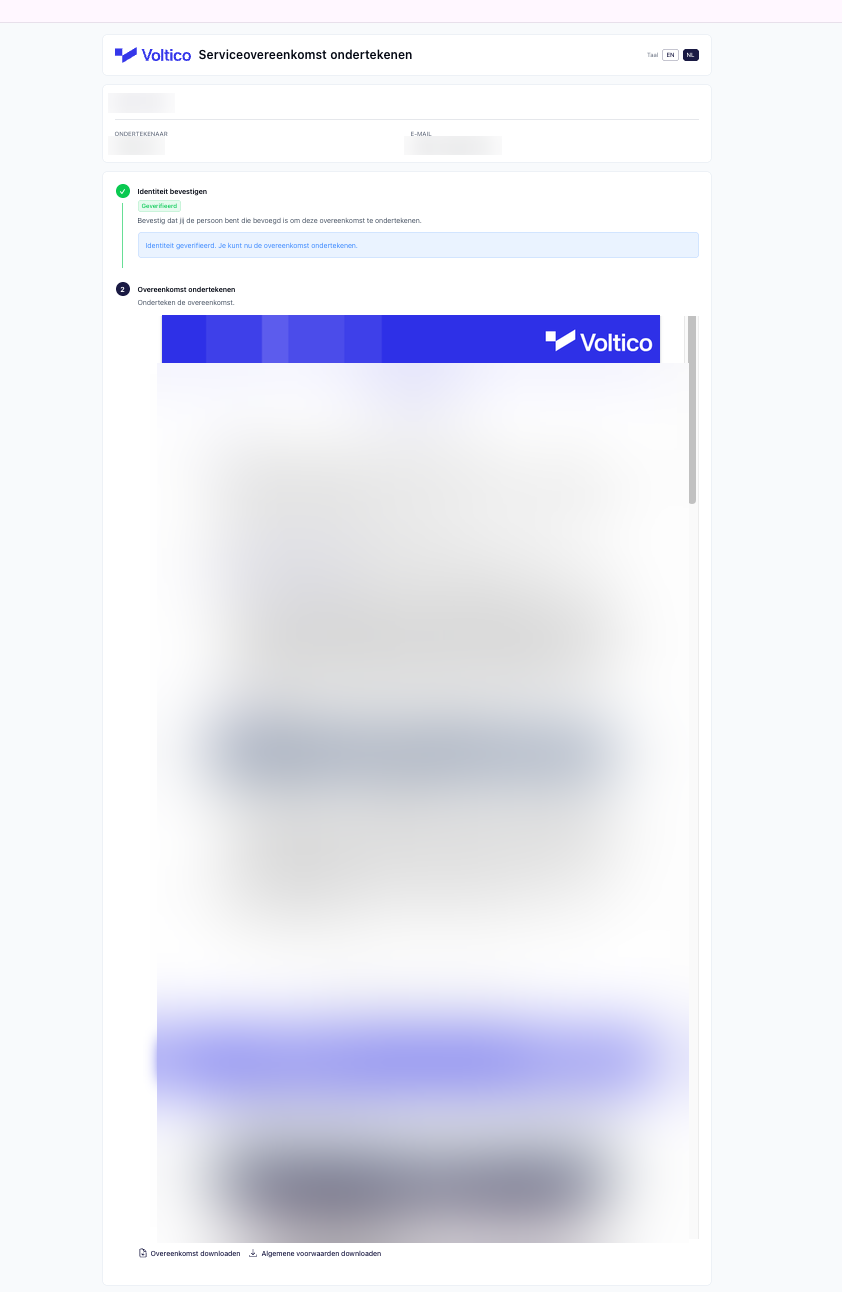
Once the identity is verified, the authorisation agreement opens straight away on the same page. With it, the signatory gives Voltico permission to register the charging sessions, to sell the emission reduction units (EREs) that this produces and to pay out the company’s share. Action needed: yes, by the signatory. For the applicant this is the moment to wait for the email with the signed agreement.
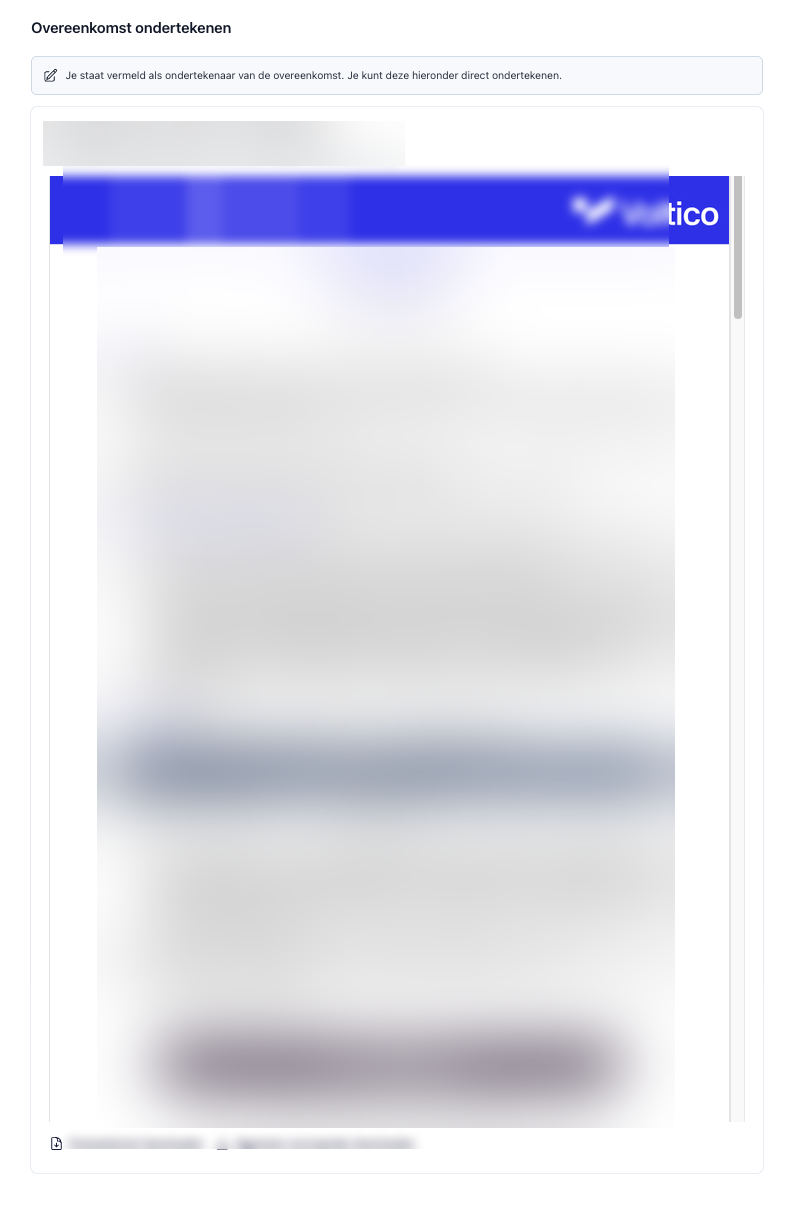
- Read the agreement. The details of the company and the locations are already in it.
- Click Download agreement and Download terms and conditions and save both files.
- Click Sign now and follow the instructions on the screen.
What it costs and what you sign. No subscription, connection fee or start-up fee. Voltico keeps a service fee on the actual ERE revenue: from 20%, lower as your volume grows. If no EREs can be generated, your company pays nothing. This is a summary. If it differs from the authorisation agreement, the agreement applies.
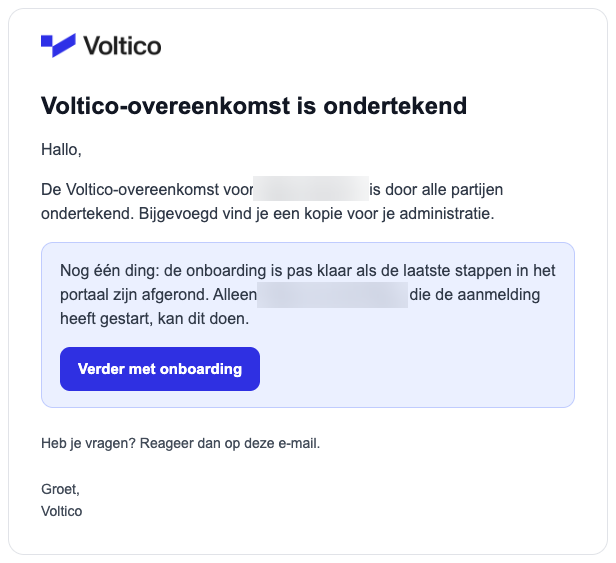
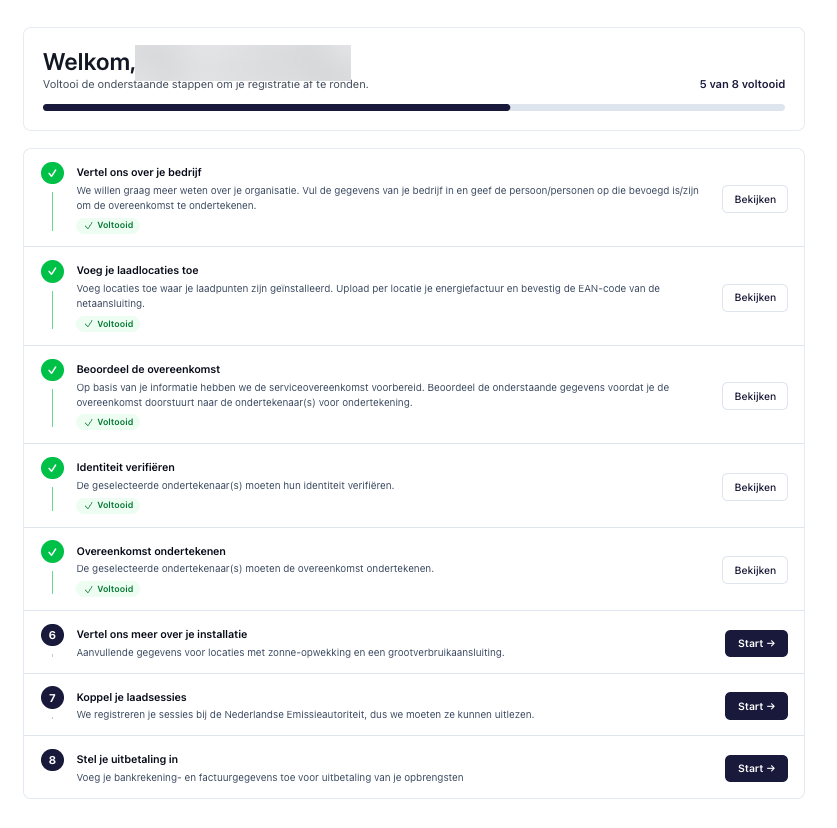
Back to the applicant: what happens after signing?
Step 6 · Applicant, only with your own solar generation on large consumption
Tell us more about your installation
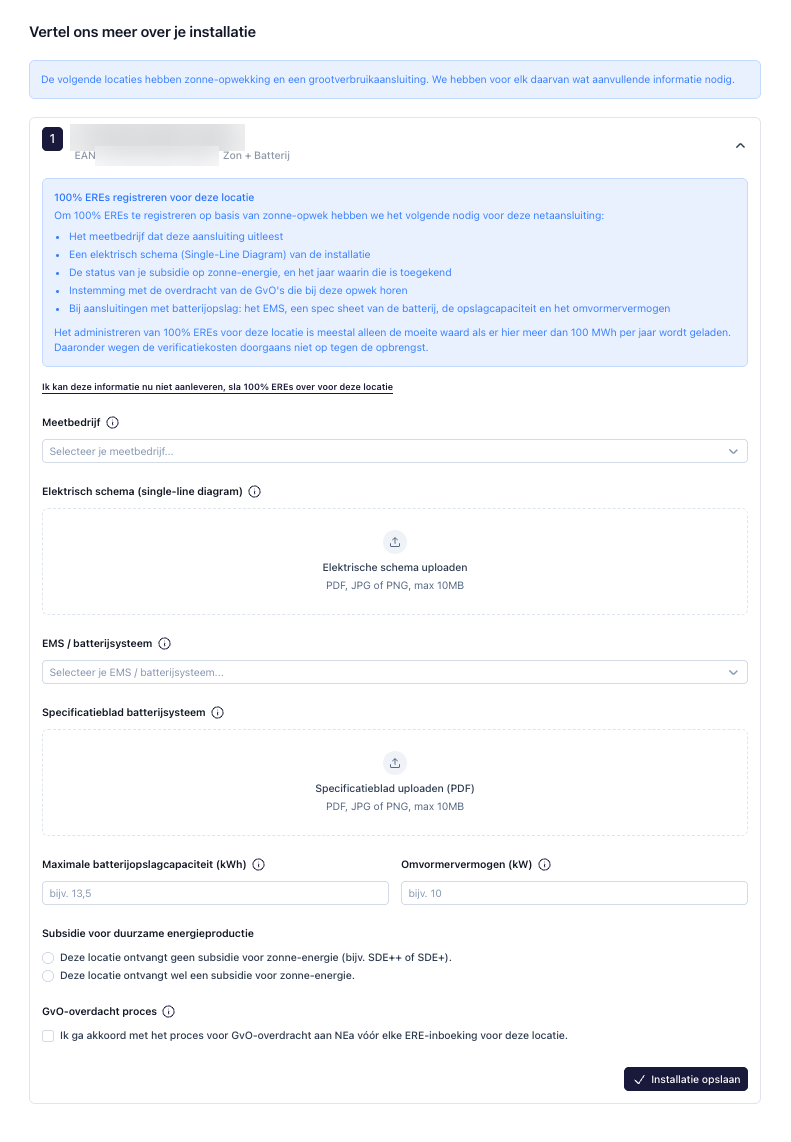
This step is only for companies with their own solar generation on a large-consumption connection. We may then be able to register EREs on all the electricity you charge, and not only on the renewable share of the grid. Do you not have that? Then skip this step and go to step 7. Action needed: only if this applies to a location.
- Open the location.
- Choose the metering company that reads the connection.
- Upload the electrical diagram (single-line diagram): PDF, JPG or PNG, at most 10 MB.
- With a battery: choose the EMS / battery system, upload the specification sheet and enter the storage capacity (kWh) and the inverter power (kW).
- Say whether the location receives subsidy for solar energy.
- Tick that you agree to the GvO transfer.
- Click Save installation. The location gets the label Completed.
Is it worth it?. Usually only above 100 MWh of electricity charged per year. Below that, the verification costs do not outweigh the revenue. Then click I cannot provide this information now, skip 100% EREs for this location.
Step 7 · Applicant
Connect your charging sessions
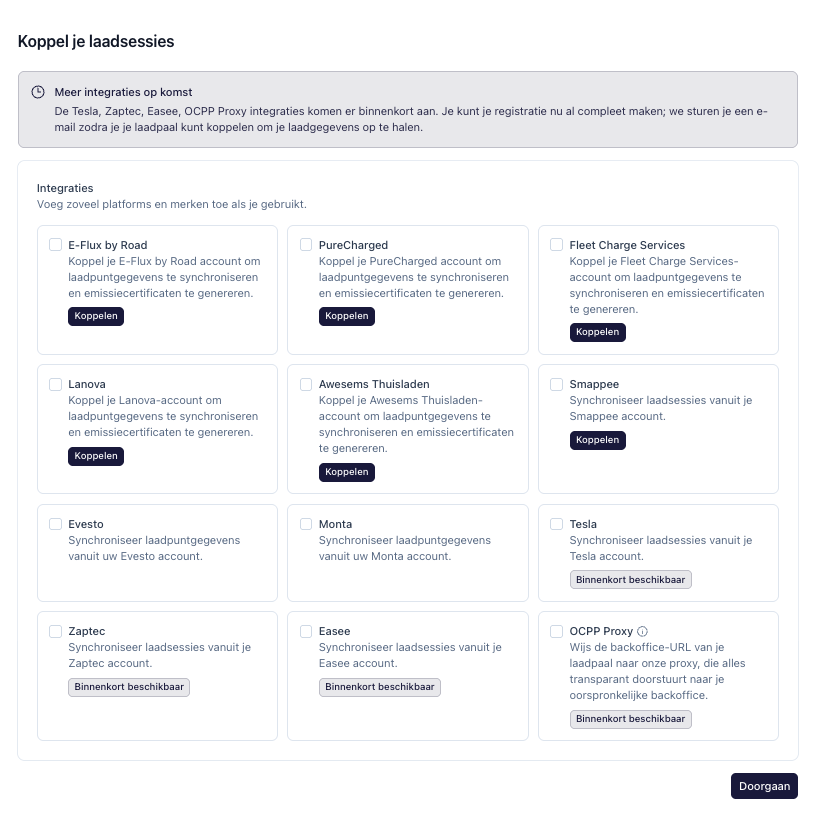
We register your charging sessions with the Dutch Emissions Authority (NEa), so we need to be able to read them. You arrange that by connecting the platforms or brands of your charge points. Action needed: yes. Once you are connected, the sessions come in by themselves.
- In your overview, click Start next to Connect your charging sessions.
- Find the platforms and brands of your charge points in the list and tick them.
- Click Connect and log in with your account for that platform.
- Do you use more than one platform? Connect them all.
- Click Continue.
Does it say ‘Coming soon’?. Finish your sign-up anyway. We will email you as soon as you can connect your charge points.
Step 8 · Applicant
Set up your payout
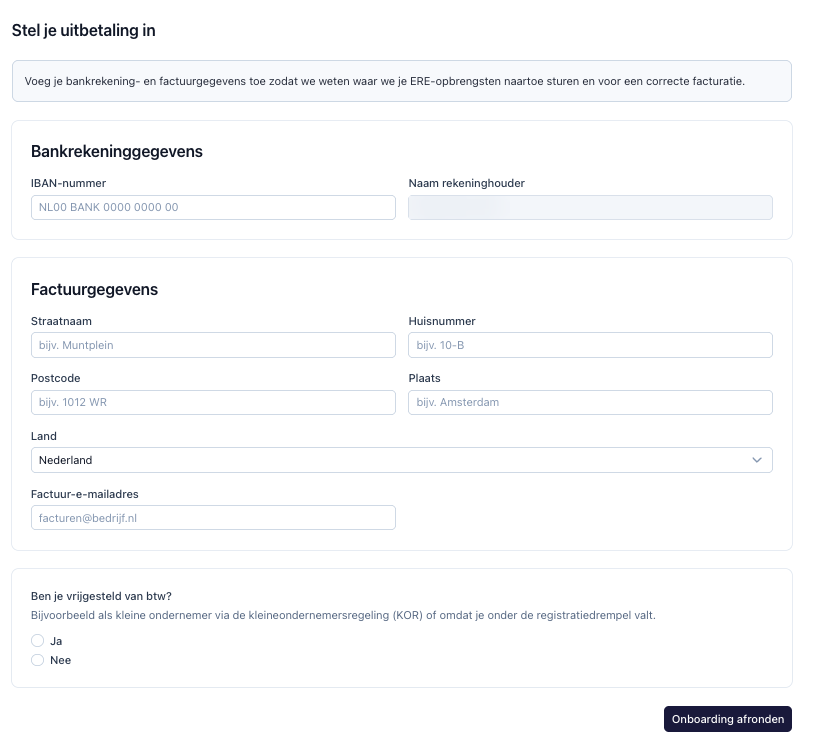
The last step. Here you say which account we pay the revenue into and how we invoice. Action needed: yes.
- Enter your company’s IBAN. The account holder’s name is already filled in.
- Enter the invoice address: street, house number, postcode, town and country.
- Enter the email address for invoices.
- Answer the question Are you exempt from VAT? Choose Yes if your company uses the small business scheme (KOR) or falls under the registration threshold. Otherwise choose No.
- Check the IBAN once more and click Complete onboarding.
Before you click. As soon as you click Complete onboarding, your sign-up goes to our team for review. So check the IBAN once more.
After you sign up
Usually within 5 working days
Someone on our team checks your sign-up and emails you the outcome: approved, or what is not right yet, so we can sort it out together.
From then on
Once your charge points are connected, your charging sessions come in automatically. You do not need to do anything.
After the sale
We sell your EREs and transfer your company’s share to your company’s account.
Stuck? Quick fixes
The energy bill is rejected
I cannot upload the bill
The bill consists of two files
Our company cannot be found
The wrong signatory is listed
The signatory did not get an email
The identity check fails
Signing does not work
Our charging platform says ‘Coming soon’
I made a mistake in an earlier step
I cannot find my login email
Still stuck? Use the message window in your onboarding, or email support@voltico.nl with the email address you signed up with.
Frequently asked questions
Signing up and locations
Small or large consumption: what does that mean for our sign-up?
Our bill is in a trade name or in the owner’s name.
Two companies with the same name are in the list.
The energy bill was rejected.
Do we have to provide anything later?
Do charging sessions from before the sign-up count?
The agreement and signing
Can we read the agreement first?
Who may sign?
What happens after Send for signature?
Why does the signatory have to show an ID document?
Costs and term
What does it cost?
How long does the agreement run and can we cancel?
Own solar generation (step 6)
What does your own solar generation give you?
Is that worth it?
Why do you ask about subsidy and the GvO transfer?
Connecting and payout
Which data do you read?
Our platform is not listed, or it says Coming soon.
Do we choose Yes or No for the VAT question?
When is the payout?
Next
Signing up as an individual
The energy contract is in your own name. Signing up in six steps.
View the plan
How do ERE credits get paid out?
ERE credits generate revenue only after they are verified and sold. Learn how the payout process works and how often you receive a payout.
Read article
ERE compliance requirements for charging stations
ERE credits are only issued if your charging data meets strict standards. Learn what compliance requires, why data fails, and how to protect your revenue.
Read article